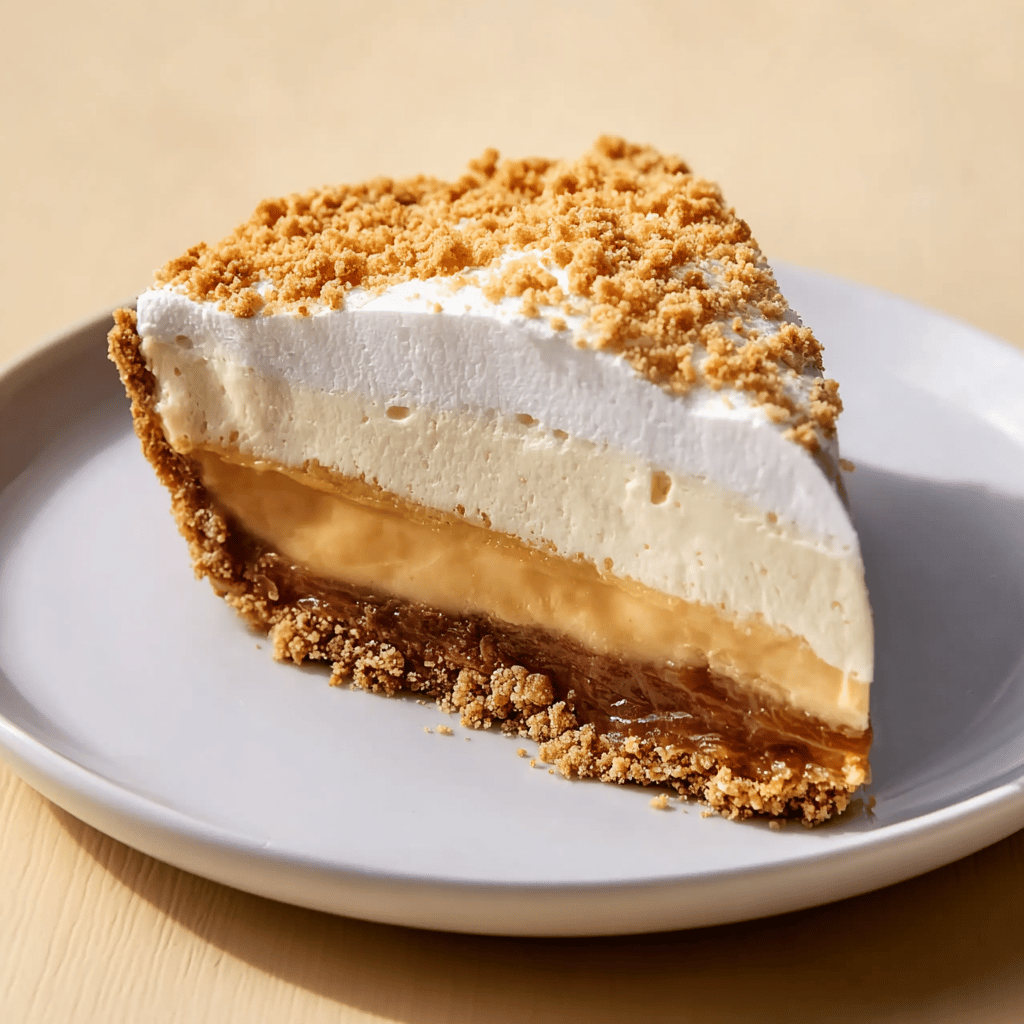
I’ll never forget the first time I tried to make Peanut Butter Pie. It was for a summer potluck, and let’s just say, it didn’t go as planned. My crust was crumbly, and the filling – oh, the filling – was somehow both runny and lumpy. Everyone was polite about it, but I knew I had to up my game. Fast forward through a few more trials and errors, and I finally nailed it. And now, my dear reader, I’m passing my tried-and-true Peanut Butter Pie recipe onto you – with all the tips to avoid my past mistakes.
My family adores this pie. It’s the kind of dessert that makes an appearance at every gathering, and there’s never a slice left. I mean, who can resist that creamy peanut butter goodness paired with a buttery crust? It’s sweet, it’s salty, and it’s absolutely irresistible. So, grab your apron, and let’s get to pie-making!
Table of Contents
Ingredients
Alright, here’s what you’ll need. And don’t worry, I’m all about that trip to the local supermarket, so there’s nothing too fancy here:
- 1 1/2 cups graham cracker crumbs (you know what? Just smash ’em up in a bag, it’s therapeutic)
- 1/4 cup granulated sugar
- 6 tablespoons unsalted butter, melted (trust me, it makes all the difference)
- 1 cup creamy peanut butter (the brand your grandma used is fine)
- 1 package (8 ounces) cream cheese, softened (don’t try to rush this)
- 1 1/4 cups powdered sugar
- 1 package (8 ounces) whipped topping, thawed (or make your own if you’re feeling fancy)
- Chocolate shavings or chips, for garnish (because, chocolate)
Instructions
Now, about those instructions… Follow these steps, and you’ll be the hit of any event:
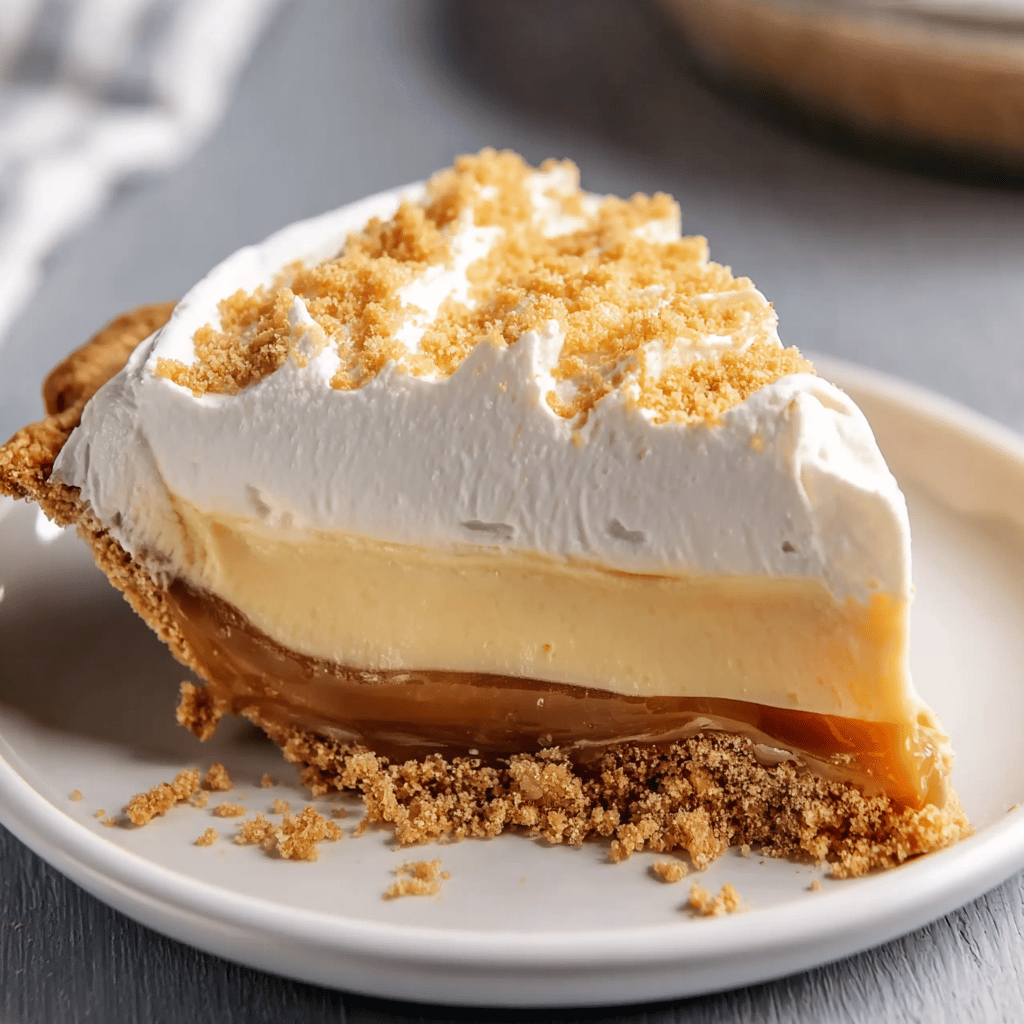
- Mix graham cracker crumbs with sugar and melted butter until well combined. Press into the bottom and up the sides of a 9-inch pie dish. Chill in the fridge for about 15 minutes to set.
- In a large mixing bowl, combine peanut butter and cream cheese until smooth. Honestly, a hand mixer works wonders here.
- Gradually add powdered sugar and keep mixing. You’ll want that arm workout, so it’s smooth and fluffy.
- Fold in the whipped topping gently – don’t knock out all that air you just worked in!
- Spoon the filling into the crust and smooth the top with a spatula. If it’s not perfect, don’t stress. It’ll still taste amazing.
- Chill the pie in the fridge for at least 4 hours, but overnight is best if you can wait that long.
- Right before serving, garnish with chocolate shavings. It’s like putting a bow on a present!
Tips & Tricks
After my blunders, I’ve picked up a few tips that I swear by (learned these the hard way):
- For a crisper crust, you can pre-bake it for 8-10 minutes at 350°F before chilling. Just watch it closely!
- If you’re a chunky peanut butter fan, go ahead and use it for some texture. But smooth works best for a creamier filling.
- Want a lighter pie? Substitute half of the whipped topping with Greek yogurt. It adds a nice tang!
- Don’t skimp on the chilling time. I know it’s hard to wait, but it’s what sets this pie apart from those runny disasters.
FAQ
Got questions? I’ve got answers:
Q: Can I make this pie ahead of time?
A: Absolutely! It actually tastes better the next day. Just cover it and keep it in the fridge.
Q: Are there any substitutions for cream cheese?
A: You can use mascarpone for a richer flavor, but honestly, cream cheese is your best bet.
Q: How do I store leftovers?
A: If you have any (which I doubt), cover it with plastic wrap and it’ll be good in the fridge for up to 3 days.
Troubleshooting
If you run into issues, here’s what might have gone wrong:
- If the crust is crumbly: you might’ve skimped on the butter. It’s the glue that holds it together!
- Runny filling? Your whipped topping might not have been thawed properly, or you didn’t chill the pie long enough.
- Lumpy texture? Make sure that cream cheese is softened, and don’t rush the mixing.
Now, let me tell you a little culturalStory. Peanut Butter Pie isn’t just a dessert; it’s a slice of home. Growing up in the South, it was a staple at every family reunion and church picnic. It’s a humble pie that doesn’t show off but always steals the show. When I make it, I’m not just following a recipe; I’m weaving together threads of my heritage.
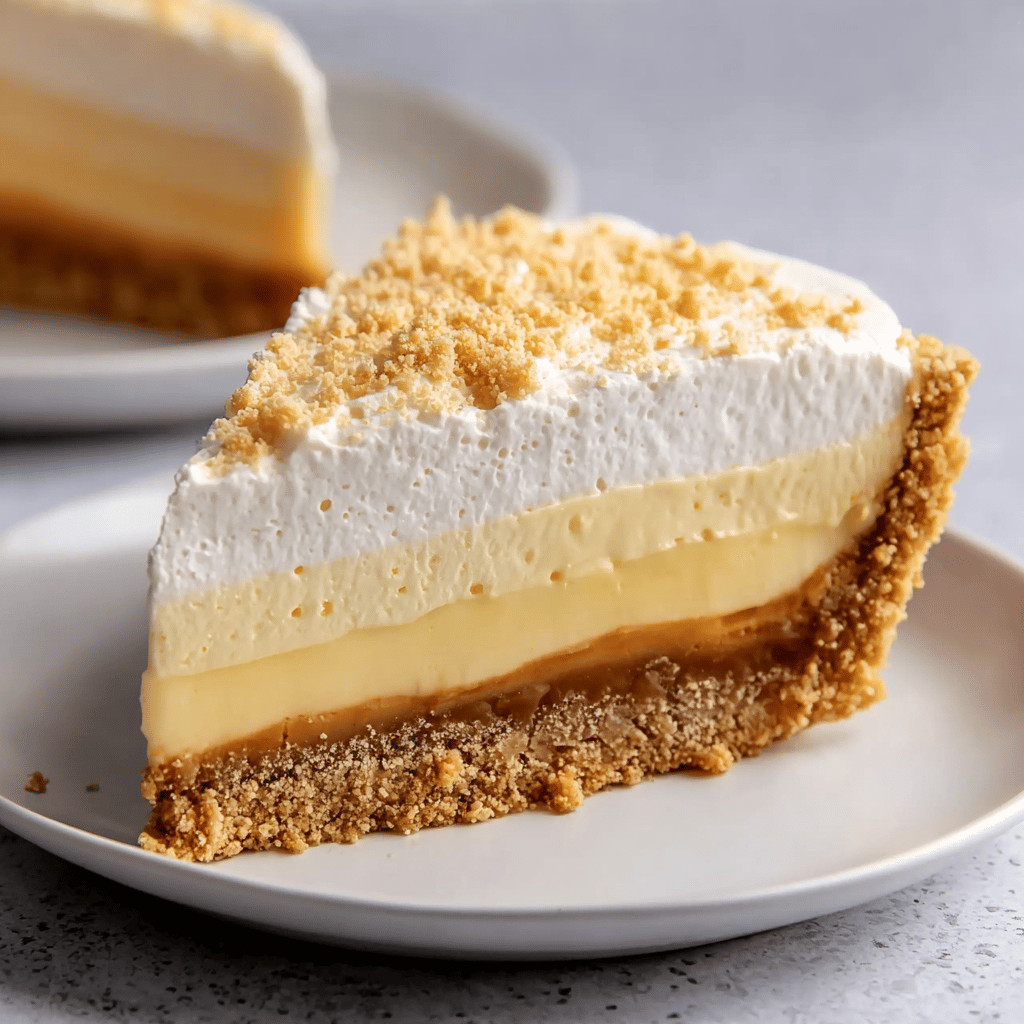
In conclusion, this Peanut Butter Pie recipe is more than just instructions and ingredients; it’s a love language, a comfort in a crust, and a testament to the power of second chances in the kitchen. So, whether you’re a seasoned baker or a first-timer, I encourage you to give this recipe a go. Share it with friends, family, or just treat yourself. Here’s to the joy of creating something delicious and the sweet taste of success. Happy baking!
Variations
Let’s talk about switching things up. I mean, the classic Peanut Butter Pie is amazing on its own, but why not get a little adventurous? Here are some variations that my friends and family have raved about:
- Chocolate Graham Cracker Crust: Just substitute the regular crumbs with chocolate crumbs for an extra chocolatey kick.
- Peanut Butter Cup Pie: Mix in chopped peanut butter cups into the filling before chilling. It’s decadent, and oh so worth it.
- Banana Peanut Butter Dream: Add a layer of sliced bananas on top of the crust before adding the filling. It’s like a peanut butter banana sandwich, but better.
- Coffee Peanut Butter Pie: Mix a teaspoon of espresso powder into the filling for a subtle coffee flavor that complements the peanut butter perfectly.
(Trust me on this) – playing with variations keeps the excitement alive, and you never know, you might just stumble upon your next signature dessert.
Calories
Okay, so this is the part where I have to be honest: Peanut Butter Pie isn’t exactly a diet food. But we’re talking about dessert here, not celery sticks. Each slice comes in at around 500-600 calories, depending on how generous you are with the filling and toppings. Remember, it’s all about balance. Enjoy your slice of pie, then maybe go for a nice walk or something. It’s worth every calorie, I promise.
Substitutions
Now, I know not everyone’s pantry looks the same, so here are some substitutions that can come in handy:
- No graham crackers? Use crushed Oreos or vanilla wafers for the crust. Game changer!
- If you’re out of powdered sugar, grind granulated sugar in a blender until it’s fine. It’s not perfect, but it’ll do in a pinch.
- Dairy-free? Use vegan cream cheese and whipped topping. It’s surprisingly good!
- For a gluten-free version, grab some gluten-free graham crackers and you’re all set.
Remember, baking is all about experimenting and making it work with what you’ve got. (I learned this the hard way when I ran out of powdered sugar on Thanksgiving day.)
Storage Tips
Let’s talk leftovers (on the off chance there are any). Here’s how to keep that pie tasting as good as it did on day one:
- Always cover your pie with plastic wrap or aluminum foil before putting it in the fridge. It keeps the moisture out and the flavors in.
- If you’ve made too much and want to save some for later, you can actually freeze this pie. Just wrap it tightly and it’ll last for up to a month. Thaw it in the fridge overnight before serving.
- Never leave the pie out at room temperature for more than two hours – food safety first!
(Honestly, the most trouble I’ve had with storing this pie is hiding it from the kids so it actually lasts more than a day.)
Cooking Tips
Before I send you off on your pie-making journey, here are some final cooking tips:
- When it comes to mixing, room temperature ingredients blend better. That means less lumps and a smoother filling.
- Use a pie shield or foil to protect the edges of your crust from getting too dark if you opt to pre-bake it.
- Patience is key when letting the pie set. If you cut into it too soon, you’ll end up with a mess. Trust me, I’ve made that mistake more than once.
- To get clean slices, dip your knife in hot water and wipe it dry between cuts. This little trick makes you look like a pro.
And there you have it, everything you need to know to make a Peanut Butter Pie that’ll have your friends and family begging for the recipe. (Just send them my way, okay?)
Conclusion
In wrapping up, this Peanut Butter Pie recipe holds a special place in my heart. I’ve shared it during joyful celebrations, comforted friends with it during tough times, and it’s been a bridge to my Southern roots. It’s taught me persistence in the kitchen and the joy of sharing something homemade with the ones you love.
Whether you’re making this for a special occasion or just a Tuesday night treat, I hope this recipe brings as much joy to your table as it has to mine. Here’s to the magic of peanut butter and the power of a good pie to make any day a little sweeter. Now go ahead, make some memories, and most importantly, enjoy every bite!
Happy baking, and remember: life’s too short to say no to pie.