The first time I tried baking sourdough bread in my Dutch oven, I honestly thought it was going to be a catastrophe. I mean, the dough was stickier than my toddler after an ice cream cone, and I was pretty sure I had just wasted a whole afternoon. But let me tell you, when that loaf came out of the oven with a crust so golden and crackly it sounded like applause, I felt like a kitchen wizard. It was a game changer!
Now, I’m hooked on the process. There’s something about the earthy smell of sourdough and the rhythmic kneading that’s just so… grounding. And don’t get me started on slicing into a fresh loaf – it’s like a warm hug for your soul. So gather ’round, fellow bread enthusiasts, and let’s dive into the cozy world of Dutch Oven Sourdough Bread together!
Table of Contents
Ingredients
Before we jump into the magic of bread-making, here’s what you’ll need. And trust me, I’ve made the mistake of starting without double-checking my pantry – don’t be like me!
- 3 cups all-purpose flour (I’m a King Arthur Flour devotee)
- 1 cup active sourdough starter (the heart of our bread!)
- 1 1/2 teaspoons salt (brings out the flavor)
- 1 1/4 cups warm water (not too hot – think baby bath temperature)
- Cornmeal or extra flour, for dusting (because nobody likes a sticky situation)
Instructions
Alright, let’s roll up our sleeves and get down to it. Remember, bread-making is more art than science, so don’t stress if things seem a bit off. It’ll all come together in the end!
- In a large mixing bowl, whisk together the flour and salt. Then, in the center, add the sourdough starter and water. Mix it with your hands or a wooden spoon until you have a shaggy dough.
- Cover the bowl with a damp cloth and let it rest. This is where the magic starts – the dough will begin to rise and bubble, thanks to the wild yeast in the starter. I usually give it a good 12-14 hours (overnight works great).
- After the long rise, gently fold the dough onto a lightly floured surface. Shape it into a round loaf, but don’t overwork it. You want to keep those beautiful air pockets intact!
- Place the dough on a piece of parchment paper dusted with cornmeal or flour. Lift the parchment and settle the dough into a bowl to hold its shape during the second rise. Another 1-2 hours should do the trick.
- Preheat your oven to 450°F with the Dutch oven inside. Once it’s screaming hot, carefully remove it (watch those hands!) and plop your dough inside, parchment and all.
- Put the lid on and bake for 25 minutes. After that, remove the lid and let it bake for another 20-30 minutes, until the crust is deeply browned and the loaf sounds hollow when tapped.
- Resist the urge to slice right away! Let it cool on a wire rack so you don’t end up with gummy bread. Patience, my friend, is a virtue here.
Tips & Tricks
Here’s the thing: sourdough can smell fear, so go into this process with confidence and these trusty tips up your sleeve:
- If your kitchen is on the cooler side, try finding a warm spot for your dough to rise. On top of the fridge or in a turned-off oven with the light on works wonders.
- Too sticky? Add flour a tablespoon at a time during the shaping process, but don’t go overboard. You’re not looking for Play-Doh consistency.
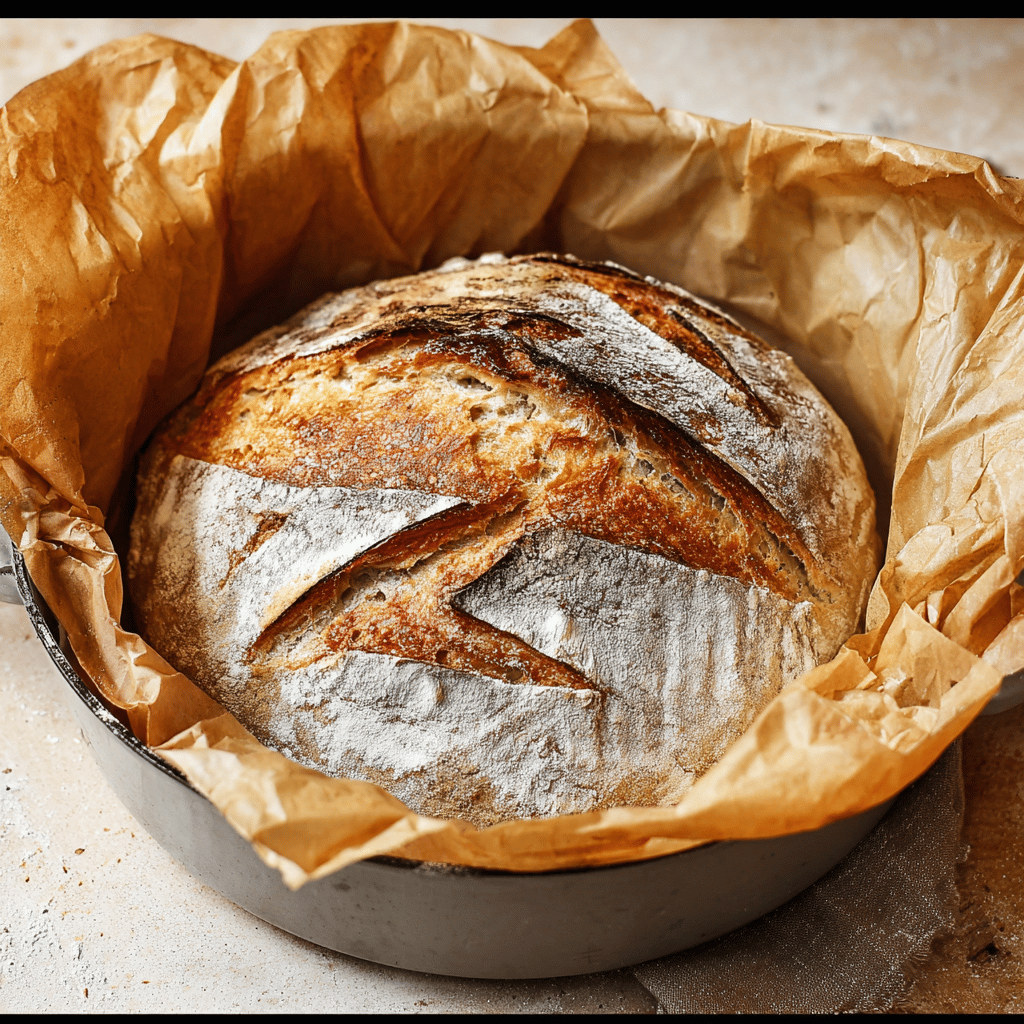
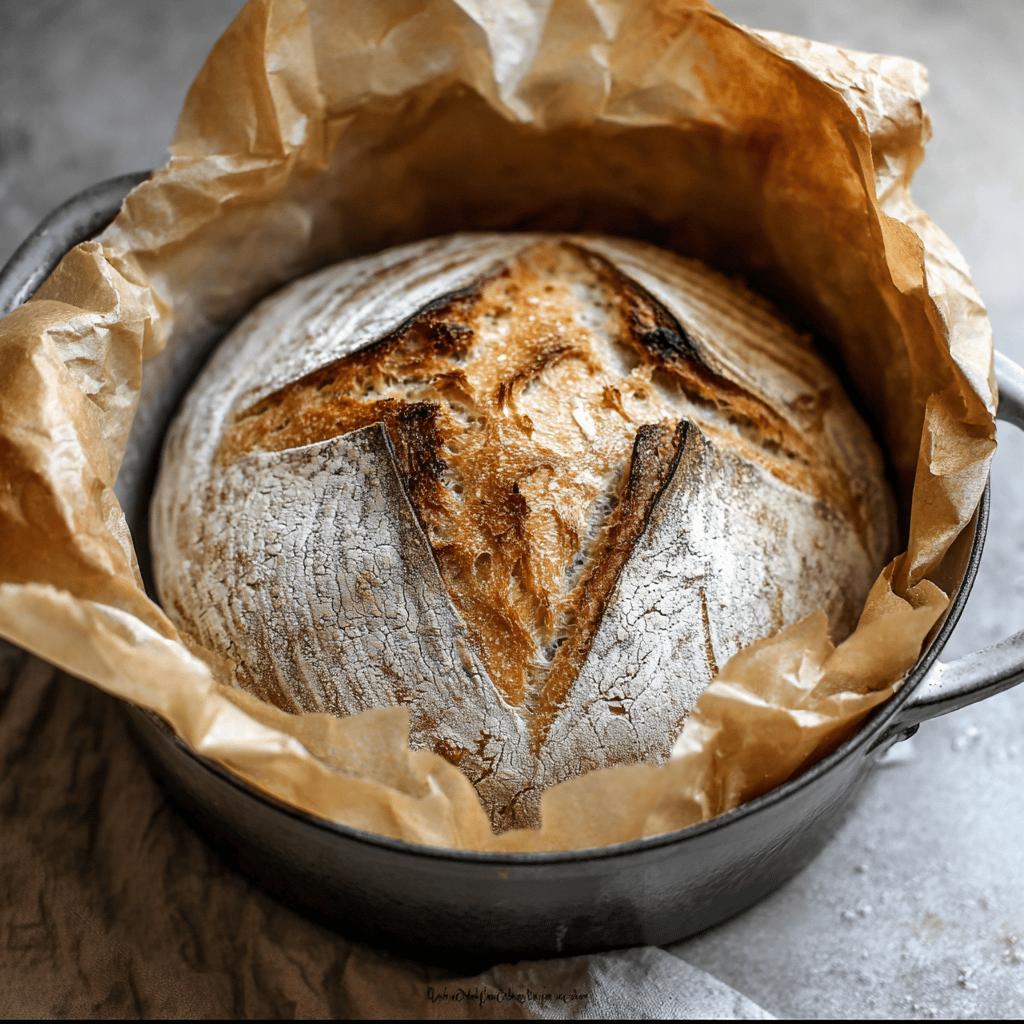
- Want to get that artisan bakery look? Use a sharp knife or a razor blade to score the top of the dough before baking. It’s not just for looks – it helps the bread expand while baking.
- Speaking of scoring, get creative! Leaves, wheat stalks, or a simple “X” make your loaf uniquely yours.
FAQ
I’ve had my fair share of “learning experiences” while making this bread, so let me save you some trouble:
Q: My dough didn’t rise, what gives?
A: Ah, the classic sourdough snafu. Make sure your starter is active! If it’s not bubbling and doubling in size when you feed it, it might be time to show it some love or start anew.
Q: Can I use whole wheat flour?
A: You bet! But I’d recommend starting with a mix – try half whole wheat, half all-purpose – to keep the bread from getting too dense.
Q: How do I store sourdough so it stays fresh?
A: The best way is to keep it in a bread box or wrapped in a clean cloth inside a paper bag. Plastic can make the crust soft, so steer clear if you’re a crunch lover.
Let’s not forget about the calories – a slice of this homemade wonder comes in at around 120 calories. It’s totally worth it for a treat that’s both delicious and nourishing. And if you’re looking to switch things up, feel free to substitute in some rye or spelt flour for a different flavor profile.
As for storage, keep your sourdough in a bread box or wrapped in a linen towel to maintain that irresistible crust. It’ll keep for a few days, but honestly, it’s usually devoured long before then in my house!
Now, here’s a little cultural story for you. Sourdough bread has a rich history, dating back to ancient civilizations. It’s a craft that’s been passed down through generations and each loaf tells a story. When I bake, I feel connected to the bakers of yesteryear, nurturing a living thing that will become part of my family’s memories. It’s about more than just bread; it’s about tradition, patience, and the simple joy of creating something from scratch.
Wrapping up, remember that baking sourdough is as much about the journey as it is about the destination. There will be flops (I’ve had loaves that could double as doorstops), but there will also be triumphs. Each crack in the crust, each tender crumb, tells the story of your hands and heart working together. So embrace the imperfections, cherish the successes, and above all, enjoy the delicious, warm, soul-satisfying slices of life that come out of your Dutch oven. Happy baking!