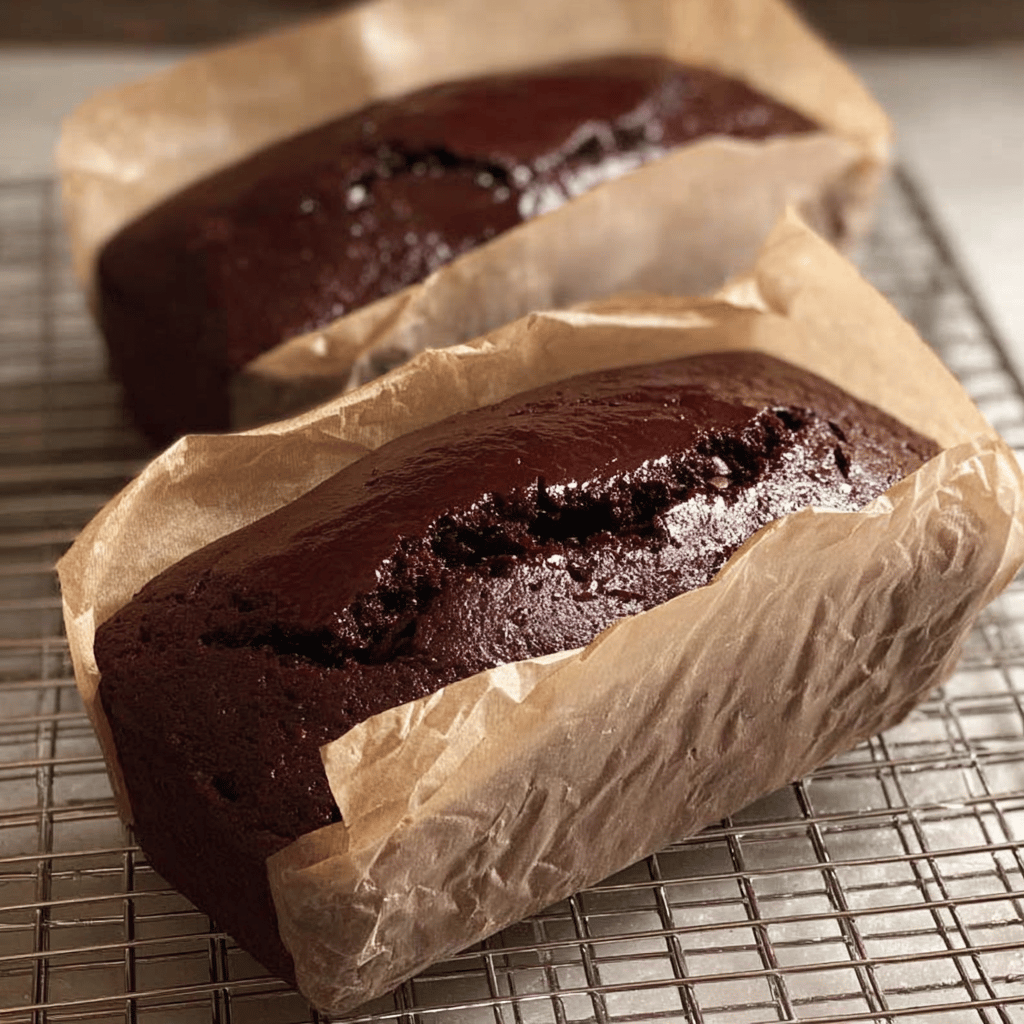
You know what? Chocolate pound cake has to be my Achilles’ heel. I mean, I’ve made this recipe more times than I can count, and yet it took me a good while to nail it down. There was this one time I accidentally used baking soda instead of baking powder, and let’s just say the cake was denser than a brick. But I’ve learned from my mistakes, and now, I’ve got a foolproof recipe that even my mom approves of (and she’s the toughest critic I know).
Now, this isn’t just any chocolate pound cake – it’s a rich, moist, deeply chocolatey hug in cake form. The kind of dessert that disappears quickly at family gatherings, with everyone asking, “Can I have this recipe?” Trust me, follow these steps and you’ll be the star baker in your circle. But first, let’s dive into what you’ll need.
Table of Contents
Ingredients
Okay, down to brass tacks. Here’s what you’ll need (and honestly, nothing here should be too hard to find):
- 1 cup unsalted butter, softened (I swear by a particular local brand – it makes all the difference)
- 1 3/4 cups granulated sugar
- 4 large eggs, room temperature (don’t skip this step!)
- 2 teaspoons pure vanilla extract
- 1/3 cup unsweetened cocoa powder (go for the good stuff)
- 1 3/4 cups all-purpose flour
- 1/2 teaspoon baking powder
- 1/2 teaspoon salt
- 3/4 cup milk
- Optional: 1 cup chocolate chips (because more chocolate is never a bad idea)
Instructions
Alright, let’s roll up those sleeves and get to it. (And remember, preheating is your best friend.)
- Start by preheating your oven to 325°F. Grease and flour a 9×5-inch loaf pan, or line it with parchment paper.
- In a large bowl, cream together the softened butter and sugar until light and fluffy. This is where the magic starts!
- Add eggs one at a time, beating well after each addition, then stir in vanilla extract.
- In a separate bowl, sift together the cocoa powder, flour, baking powder, and salt.
- Gradually add the dry ingredients to the butter mixture, alternating with milk. Start and end with the dry ingredients. Beat until just combined.
- If you’re using them, fold in the chocolate chips (learned the hard way that “fold” doesn’t mean “vigorously stir”).
- Pour the batter into the prepared pan and smooth the top with a spatula.
- Bake for 60-70 minutes, or until a toothpick inserted into the center comes out clean.
- Let the cake cool in the pan for 15 minutes before transferring it to a wire rack to cool completely. Patience is key!
Tips & Tricks
Now, about those ingredients… If you’re in a pinch, here are some substitutions that can save the day:
- No unsalted butter? Use salted butter and omit the 1/2 teaspoon of salt from the recipe.
- Out of milk? A half-and-half or a light cream can work in a pinch.
- If you don’t have all-purpose flour, you can use cake flour. Just add an extra 2 tablespoons per cup.
(Trust me on this, I’ve had to make do more times than I can count!)
Troubleshooting
Ran into some issues? Here’s how to fix common pound cake problems:
- If your cake is too dry, you might have overbaked it. Next time, check it a few minutes earlier than you think you should.
- Sinking in the middle? Your batter may have been overmixed, introducing too much air which then collapses. Mix just until combined next time.
- Cracks on top? That’s actually pretty normal for pound cakes. But if it bothers you, make sure your oven isn’t too hot and that you’re not overfilling the pan.
FAQ
Got questions? I’ve got answers (from experience, that is).
Q: Can I freeze chocolate pound cake?
A: Absolutely! Wrap it tightly in plastic wrap, then in foil, and freeze for up to 3 months. Defrost in the fridge before serving.
Q: How many calories are in a slice?
A: It depends on the size of the slice, but roughly you’re looking at 300-400 calories. It’s a treat, so enjoy it!
Q: Can I make this in a bundt pan?
A: Yes, you can, but you’ll need to adjust the baking time. Bundt cakes typically take a bit longer, so keep an eye on it.
Conclusion
And there you have it, my go-to chocolate pound cake that has seen me through last-minute school events, potlucks, and those “I need chocolate” moments. It’s rich, it’s satisfying, and it’s got that homemade touch that just can’t be beaten. Every time I serve it, I’m reminded of the journey it took to perfect it, and honestly, it makes me love it even more.
So, from my kitchen to yours, I hope this chocolate pound cake brings you as much joy (and as many compliments) as it has brought me. Now, go forth and bake with confidence – and a little bit of chocolate smeared on your cheek.

Storage Tips
Now, if by some miracle you’ve got leftovers, here’s how to keep that pound cake tasting fresh. First off, tightly wrap the cake in plastic wrap, not once, but twice. That’s right, double wrap it. This keeps it from drying out or absorbing any weird fridge smells. If you’re planning to devour it within a week (and let’s be honest, who isn’t?), you can keep it at room temperature. But if you’re trying to exercise some self-control, pop it in the fridge. It’ll stay good for up to two weeks there. (Learned this the hard way when I found a stale slice in the back of my pantry once – never again, my friends, never again.)
Cooking Tips
Here’s a little secret I picked up from my grandma’s recipe notes that she kept tucked in her cookbook – always have your ingredients at room temperature. It seems small, but it makes a difference in how the ingredients come together. Cold eggs or butter can lead to a cake that’s denser than you want. And when you’re creaming that butter and sugar? Do it until it’s almost white in color – that’s when you know you’ve got the right amount of air whipped into it.
Another game changer? Use high-quality cocoa powder. It’s the star of the show, so you want it to stand out. And for that extra touch of decadence, throw in a teaspoon of instant coffee powder to the batter. It won’t taste like coffee – it just deepens that chocolate flavor to a level that’ll have your neighbors knocking on your door. Trust me, it’s that good.
The Story Behind the Cake
Chocolate pound cake isn’t just a recipe in my family, it’s a tradition, a piece of heritage passed down through generations. I remember my great-grandmother used to make it with chocolate she would barter for at the local farmer’s market – that’s how coveted this cake was. And when she baked, the whole house would fill up with this intoxicating aroma that meant comfort and love. It was the centerpiece for every major celebration, and honestly, it still is. I’ve carried on that legacy, tweaking it here and there (sometimes accidentally), but the essence of her recipe is still there, in every slice.
It’s more than just cake; it’s a slice of history, a story on a plate. When I bake this cake, I’m not just following a recipe; I’m continuing a narrative that’s been in the making for over a century. And that, my friends, is why I cherish this chocolate pound cake so deeply.

So there you have it – my slightly imperfect, sometimes frustrating, but ultimately triumphant journey with chocolate pound cake. From the dense bricks of my early attempts to the family-praised dessert it is today, it’s been quite the ride. And now, with these tips, tricks, and a bit of family history, you’re all set to start your own chocolate pound cake saga.
Whether it’s for a special occasion or just because you need that chocolate fix, I hope this recipe brings a little sweetness to your life. Remember, baking is not just about following a recipe; it’s about creating memories, sharing love, and sometimes, laughing at your own mishaps in the kitchen. Happy baking!
(And don’t worry, if your first cake comes out as a brick, you’re just following in my footsteps. Keep going, you’ll get there!)