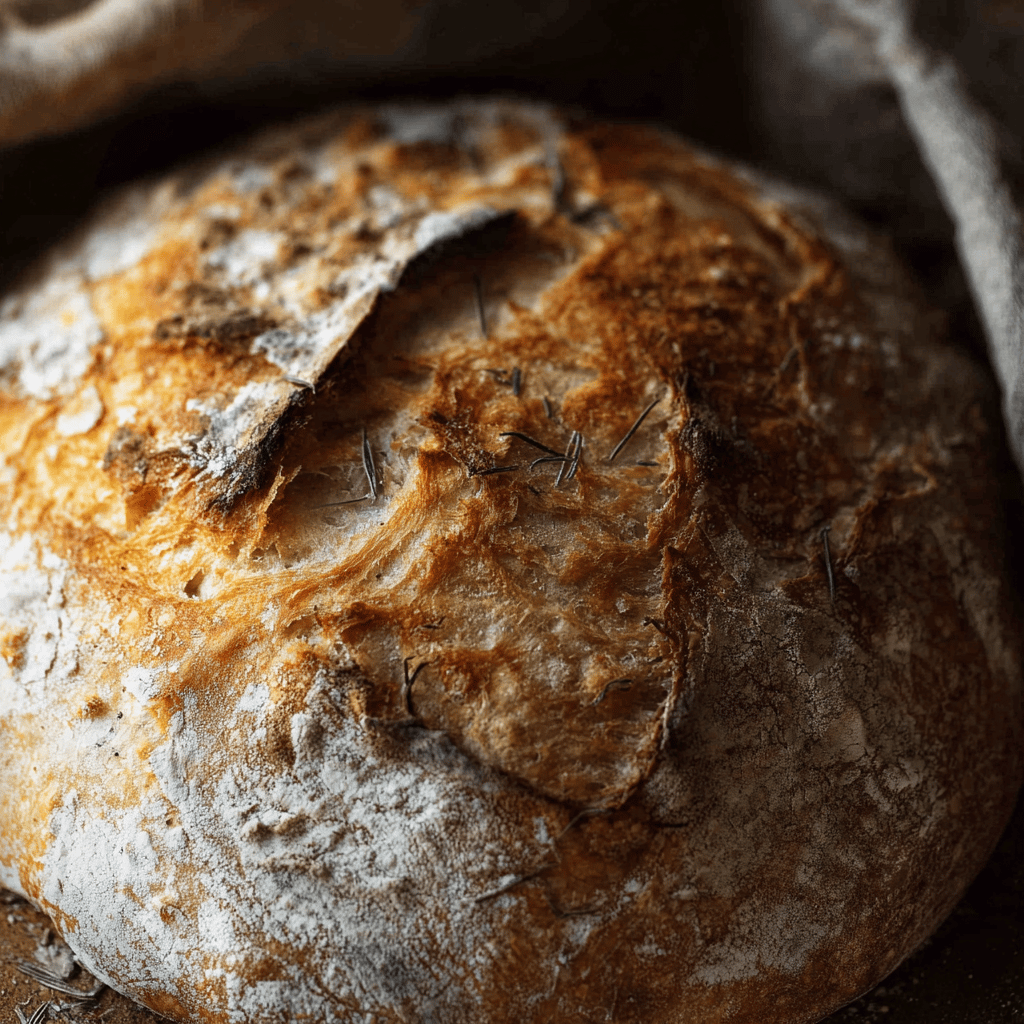
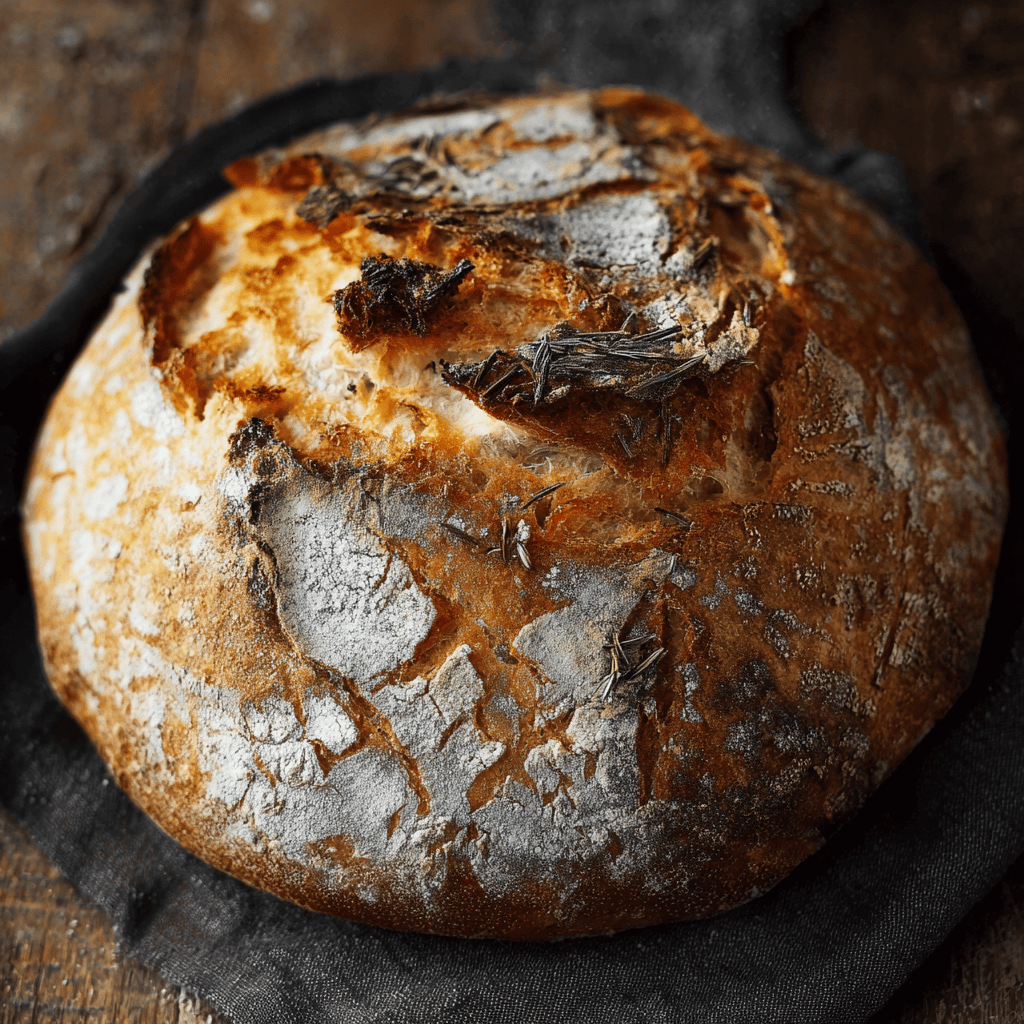
There was a time when the mere mention of sourdough bread would have me rolling my eyes. “Too complicated,” I’d mutter to myself. But oh, how wrong I was. The turning point came during a weekend at my aunt’s cottage, where the aroma of her roasted garlic and rosemary sourdough filled the air. It was love at first bite. I was determined to recreate that magic at home, and, after some trial and error (and a few loaves better suited as doorstops), I’ve honed an easy recipe that’s foolproof and delicious.
Before I dive into the details, let me set the scene. Imagine a crusty, golden loaf, with flecks of rosemary and pockets of caramelized garlic throughout. It’s a bread that’s as good with a slather of butter as it is dipped in a hearty stew. And the smell? Let’s just say my neighbors have been ‘randomly’ dropping by around baking time. Now, let’s get into it!
Table of Contents
Ingredients
Now, about those ingredients… I remember the first time I tried to wing it without measuring—let’s just say consistency is key (learned this the hard way).
- 1 cup active sourdough starter
- 1 1/2 cups warm water
- 3 1/2 cups bread flour (you can substitute up to 1 cup with whole wheat flour)
- 1 1/2 teaspoons sea salt
- 1 head of garlic, roasted and cloves mashed
- 2 tablespoons fresh rosemary, chopped (plus extra for garnish)
- Cornmeal or extra flour for dusting
Instructions
Alright, here we go. And remember—if I can manage this after serving what could only be described as a brick to my sister’s dinner party, so can you.
- Combine the sourdough starter and warm water in a large mixing bowl. Stir until well mixed.
- Add the flour and salt to the bowl, mixing until a shaggy dough forms. Don’t overwork it—trust me.
- Fold in the roasted garlic and chopped rosemary until evenly distributed throughout the dough.
- Cover the bowl with a damp cloth and let it rise until doubled in size, typically 6-8 hours, but I’ve left it for up to 12 when I’ve gotten sidetracked (game changer!).
- Once risen, turn the dough out onto a lightly floured surface and shape it into a round loaf. (Don’t punch it down; we’re not making pizza here!)
- Place the dough onto a piece of parchment paper sprinkled with cornmeal or flour. Let it rise again for about 1-2 hours, or until puffy but not quite doubled.
- Preheat your oven to 450°F with a dutch oven inside. Carefully place the dough (still on the parchment) into the heated dutch oven.
- Cover with the lid and bake for 25 minutes. Then, remove the lid and continue baking for another 20-25 minutes until the bread has a deep golden crust.
- Remove the bread from the oven and let it cool on a wire rack. Resist the urge to cut into it right away—the inside continues to cook from the residual heat.
Tips & Tricks
But here’s the thing, sourdough can be fickle, so let me share a few tips that have saved my loaf more than once.
- Always check the temperature of your water; too hot and you’ll kill the yeast, too cold and it won’t activate. Aim for around 75°F.
- Roast the garlic ahead of time. I wrap mine in foil with a drizzle of olive oil and roast for about 40 minutes at 400°F. It should be golden and soft—like butter!
- If your home is cool and the dough isn’t rising, try placing it in a turned-off oven with the light on, or on top of the fridge. Just a little warmth can make all the difference.
- Don’t skip the second rise. It’s tempting, I know, but it gives the bread that beautiful airy texture.
- For that artisanal touch, sprinkle some extra rosemary and flaky sea salt on top of the dough right before baking. Your taste buds will thank you.
FAQ
Got questions? I’ve got answers (and believe me, I’ve asked them all myself at some point).
Q: Can I use regular all-purpose flour instead of bread flour?
A: You can, but bread flour has more protein, which gives the bread its chewy texture. If you use all-purpose, the bread might be a tad denser.
Q: How do I store this bread?
A: Once fully cooled, wrap it in a clean kitchen towel or paper bag for up to 3 days. For longer storage, slice and freeze it.
Q: My bread didn’t rise as much as I expected, what happened?
A: It could be a few things: your starter might not have been active enough, the room temperature too low, or maybe the dough was overworked. Next time, ensure your starter is bubbly and active before you begin.
Troubleshooting
Let’s be real, sometimes things go sideways in the kitchen. If your bread is too dense, it might not have proofed long enough, or you might have measured the flour incorrectly (always spoon and level, don’t scoop). If it’s too flat, your dough might have been too wet or not shaped tightly enough. Remember, practice makes perfect!
And there you have it—my go-to recipe for easy roasted garlic and rosemary sourdough bread. Whether it’s your first attempt at sourdough or your hundredth, I promise this recipe is worth the effort. The flavor is rich, the texture is perfect, and the calories? Let’s just say it’s a treat worth indulging in. Happy baking, friends!
Storage Tips
Now, if you’re anything like me, you’ll want to enjoy this bread for as long as possible. Here’s the lowdown on keeping it fresh. Store the bread at room temperature for a couple of days, wrapped in a cloth or paper bag—plastic will turn the crust soft, and we don’t want that. If you need to keep it longer, slice and freeze it; toast it up for a just-baked taste even weeks later. And honestly, it’s a lifesaver when you need a quick breakfast or a side for your dinner soup.
For the roasted garlic, if you have leftovers, pop them in a jar with some olive oil, and you’ll have a flavorful addition for your next pasta or salad. (trust me on this)
Cooking Tips
Okay, a little extra advice because I can’t help myself. When it comes to sourdough, your oven can be a bit of a diva. If your bread isn’t getting that gorgeous, Instagram-worthy crust, try spritzing the oven with a little water just after you put the bread in. The steam helps create a crispier crust. And don’t get me started on scoring the dough—make a few slashes on top with a razor or sharp knife to let the bread expand during baking. It’s both functional and gives it a rustic, artisanal look.
(Oh, and another tip: if you’re not into garlic, or you’re planning to serve this bread with something sweet, just leave the garlic out. The rosemary will still make it stellar.)
Substitutions
Look, I get it. Sometimes you’re in the middle of a recipe and realize you’re out of something. Don’t panic! If you don’t have fresh rosemary, dried works in a pinch—just use half the amount. No bread flour? All-purpose will do the job, just expect a slightly different texture. And if you’re out of garlic (which, how dare you), try caramelized onions or olives for a twist. I’ve done it, and it’s still a hit at the dinner table.
Cultural Story
Every time I bake this bread, I’m taken back to that weekend at my aunt’s cottage. You know what? It’s more than just a recipe—it’s a memory, a tradition, something I’ll pass down to my kids one day. Sourdough has been around for centuries, a staple in many cultures, and it’s like I’m keeping that history alive in my own kitchen. My neighbor, who’s a history buff, tells me that civilizations were literally built on bread like this. And it’s true; there’s something deeply satisfying about connecting with the past, one loaf at a time.
Plus, let’s be real, there’s a certain pride that comes with pulling a beautiful loaf of homemade bread out of the oven. It’s like, “Yeah, I made that,” and it never fails to impress. Whether it’s for a potluck or just to make a Tuesday night dinner a bit more special, this bread has become my signature dish.
Calories
Now, I’m all about balance, and while I’m not one to count every calorie, I know it matters to some. A slice of this heavenly sourdough is about 150-200 calories, depending on the size. It’s worth noting that sourdough is often more digestible and better for you than regular white bread—so that’s a win in my book. Just savor every bite and enjoy the flavors, that’s what really counts.
In conclusion, this Easy Roasted Garlic and Rosemary Sourdough Bread is more than just a recipe—it’s a journey of flavors, a labor of love, and honestly, a pretty impressive skill to have in your culinary arsenal. So, tie on that apron, get your hands in the dough, and create something truly special. Happy baking!