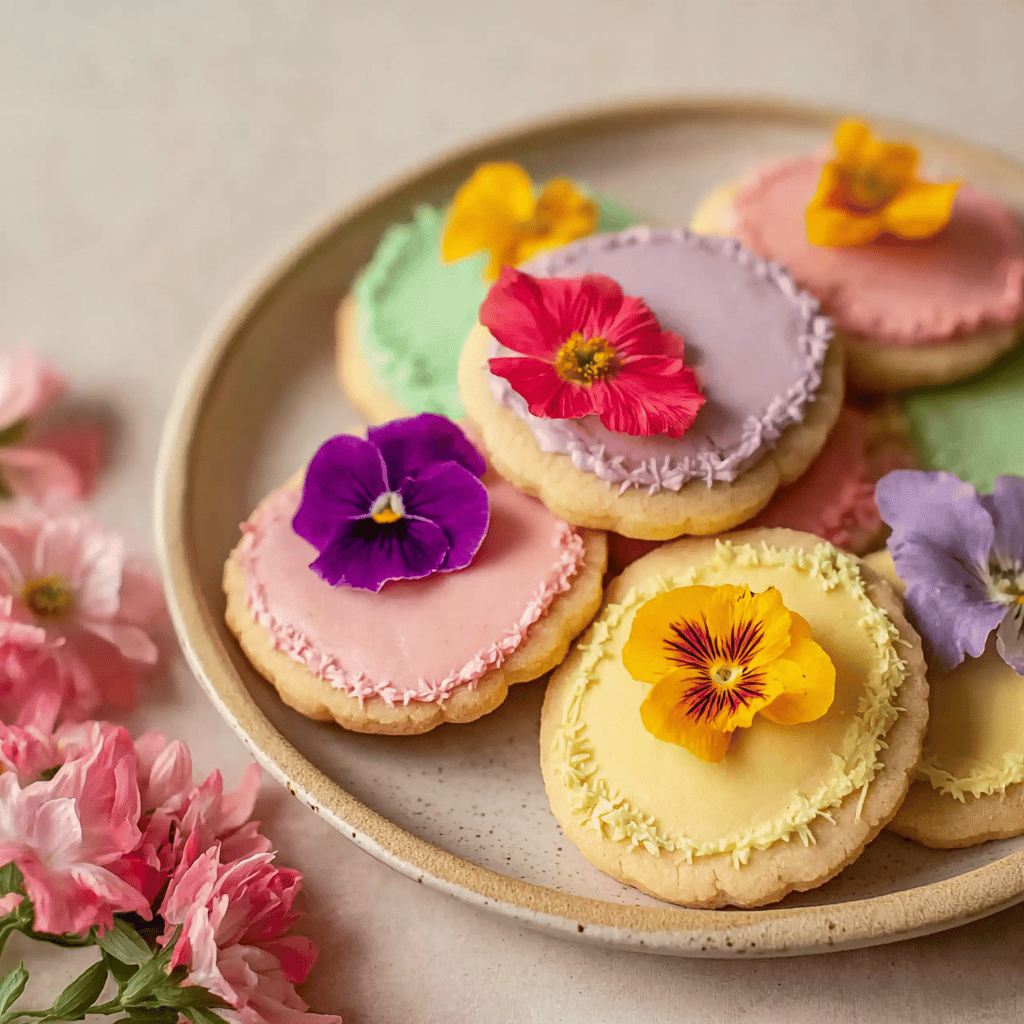
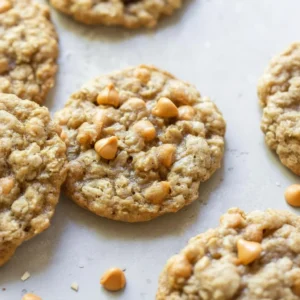
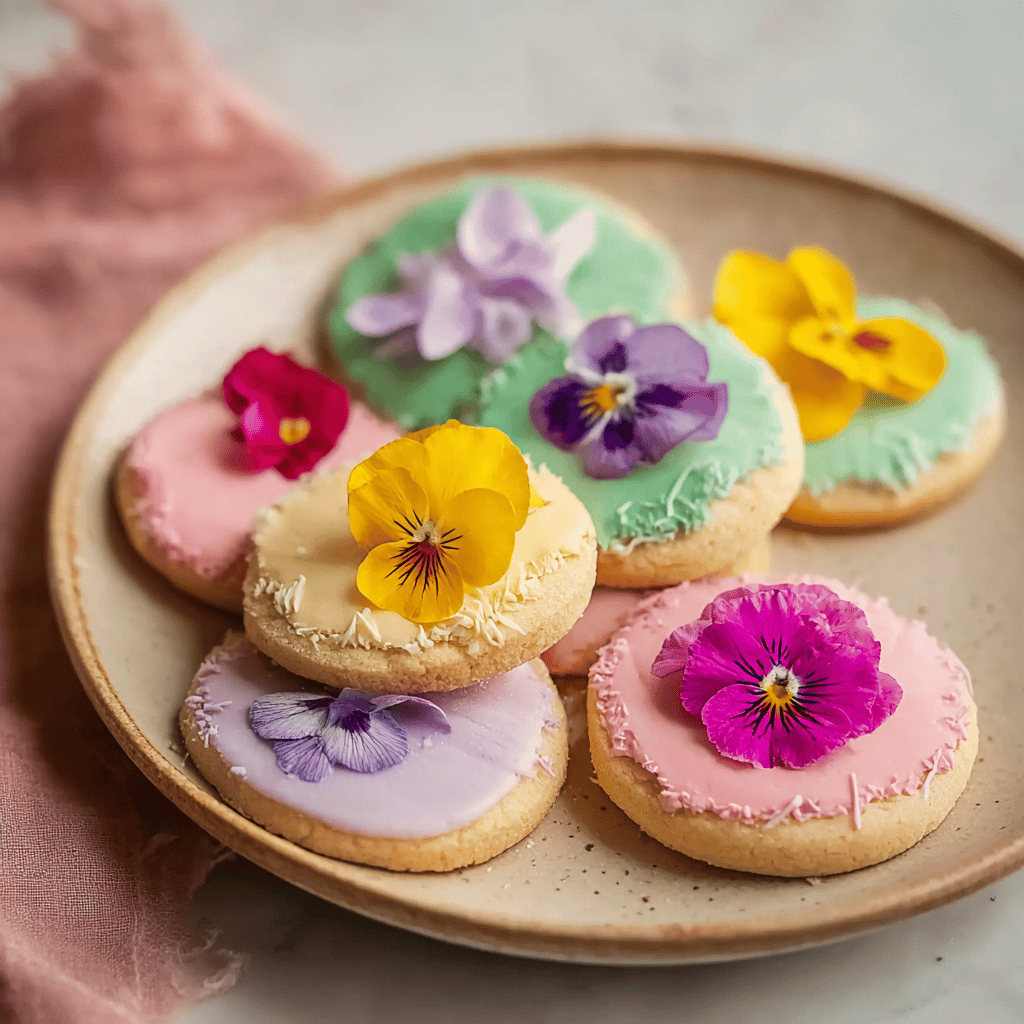
There’s something about the delicate flutter of cherry blossoms in spring that always gets me sentimental. Maybe it’s their fleeting beauty, or perhaps the way their soft pink petals dance across the breeze. Whatever it is, it inspired me to capture that essence in a cookie – my Spring Blossom Cookies. Let me tell you, the journey to perfecting this recipe was a series of trial and error. One batch was so hard, I could’ve chucked them at the wall, and they wouldn’t have crumbled! But you know what they say, third time’s the charm, and oh, did these charms turn out delightful.
Now, whenever I whip up a batch, the house fills with the sweet aroma of butter and sugar, and honestly, it’s like a warm hug from spring itself. My kids come running, eager to steal a cookie (or five) while they’re still warm. And I can’t blame them – these cookies are a little bite of the season, perfect with a cup of tea on a sunny afternoon.
Table of Contents
Ingredients
Okay, so you’re ready to dive into spring with me? Here’s what you’ll need. And don’t worry, I’ve had to make substitutions more times than I can count – it’s all part of the adventure.
- 1 cup unsalted butter, softened (seriously, don’t use the salted stuff here)
- 3/4 cup granulated sugar
- 1 large egg, room temperature (trust me, it makes a difference)
- 2 teaspoons pure vanilla extract (the good stuff, if you can manage)
- 2 1/2 cups all-purpose flour
- 1/2 teaspoon baking powder
- 1/4 teaspoon salt (just a pinch, really)
- Pink food coloring (or any springy color you love)
- Edible flower petals or sprinkles for decoration (because we’re fancy like that)
Instructions
Brace yourself, we’re about to make some cookie magic. Follow these steps, and you’ll be the talk of the town (or at least your kitchen).
- In a large mixing bowl, cream the butter and sugar together until it’s fluffy and light – think pillow-soft clouds on a spring day.
- Crack in that egg and splash in the vanilla, then beat until it’s all happily combined.
- In a separate bowl, whisk together the flour, baking powder, and salt. Gradually add this to the wet ingredients, mixing just until the dough comes together.
- Here’s the fun part: add a few drops of food coloring and knead it gently into the dough. Go for a soft pastel color or a vivid hue – it’s your canvas!
- Wrap the dough in plastic and chill it in the fridge for at least an hour (this is crucial, don’t skip it!)
- Once the dough’s chilled, preheat your oven to 350°F and line a baking sheet with parchment paper.
- Roll out the dough on a floured surface to about 1/4 inch thickness and use a flower-shaped cookie cutter to make those blossoms.
- Place the cookies onto your baking sheet and gently press an edible petal or sprinkle into the center of each one.
- Bake for 8-10 minutes, just until the edges are slightly golden. Watch them like a hawk – nobody likes a burnt blossom.
- Let the cookies cool on the sheet for a couple of minutes before transferring them to a wire rack to cool completely.
Tips & Tricks
Alright, let’s get down to the nitty-gritty. I’ve got some tips that’ll save you from cookie catastrophe. (Learned these the hard way, folks.)
- Make sure your butter is softened, but not melted. You want it to cream, not slosh around the bowl.
- For a gluten-free version, swap in your favorite GF flour blend. Just expect a bit more crumble to your cookie.
- Don’t overwork the dough – unless you’re aiming for a cookie that doubles as a jaw workout.
- If you’re not a fan of food coloring, leave it out. The cookies will still taste like a dream.
- Experiment with different edible flowers or herbs for decoration – lavender, rose petals, or even small mint leaves can add a unique touch.
FAQ
Got questions? I’ve got answers. And if I don’t, we’ll figure it out together – that’s what kitchen friends are for.
Q: Can I freeze the dough?
A: Absolutely! Wrap it tightly and it’ll keep for a couple of months. Just thaw it in the fridge before you’re ready to bake.
Q: My cookies spread too much, what happened?
A: Sounds like your butter was too warm or you skipped the chilling step. That cold dough is key to keeping the shape.
Q: Can I use natural food dyes?
A: You bet! Beet juice, turmeric, spinach powder – go wild with it. Just keep in mind the flavors might come through a bit.
Let me wrap this up with a little cultural story. In my family, springtime is about renewal and celebration. These Spring Blossom Cookies have become a symbol of that. They’re not just cookies; they’re a tradition, a way to welcome the new season and cherish the beauty around us. So when you’re rolling out that dough and watching them come to golden life in the oven, remember, you’re not just baking – you’re creating memories.
Happy baking, friends! May your Spring Blossom Cookies be as full of joy as the season itself. And remember, if I can turn my cookie disasters into these little masterpieces, so can you. (Game changer!)